Halloween Monster Cookies | Magic Recipe for Spooky, Chewy Delight
Introduction
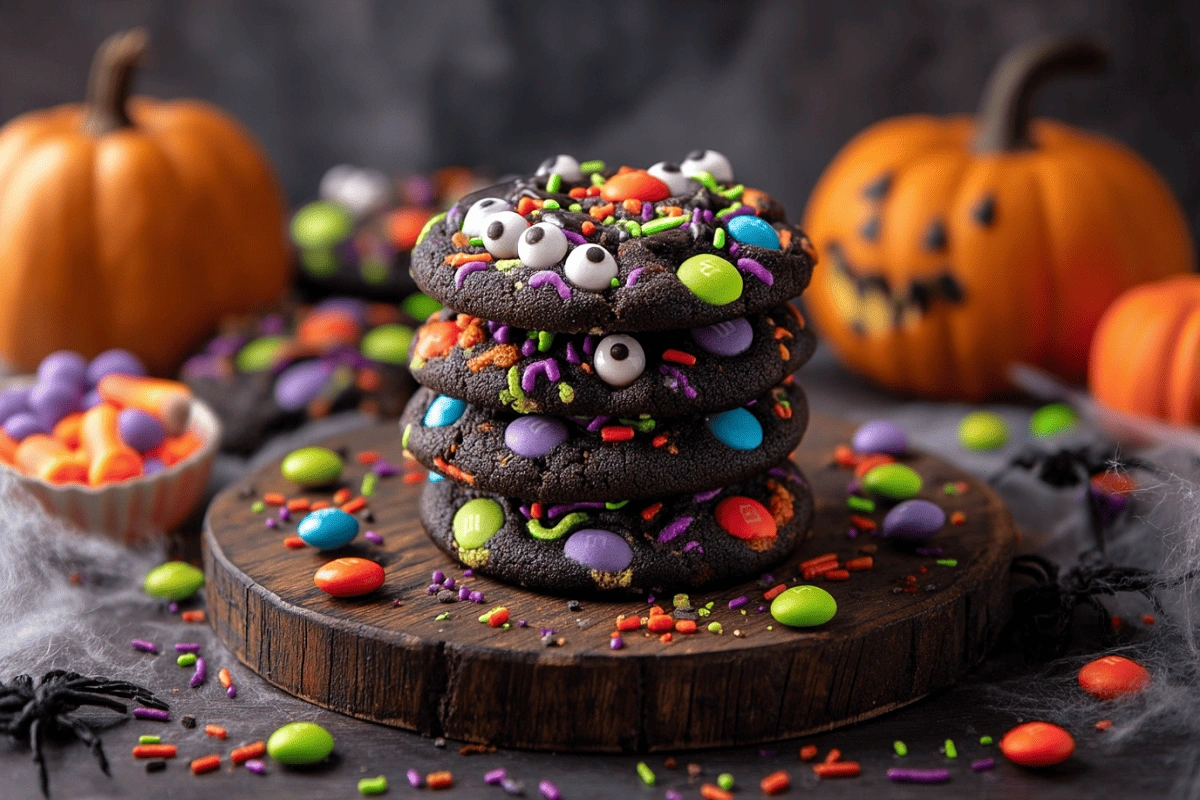
Each October, my kitchen transforms into a small spooky bakery. The smell of butter and sugar fills the air while candy wrappers scatter across the counter from my kids’ trick-or-treat stash. That’s when I know it’s time to make our family favorite: Halloween Monster Cookies. These enormous, candy-filled cookies are chewy, vibrant, and ideal for the Halloween season.
Monster cookies aren’t just a recipe they’re a tradition. Imagine a cookie so loaded with chocolate chips, oats, and leftover Halloween candy that every bite feels like a treasure hunt. It’s the kind of recipe that makes kids squeal and adults sneak “just one more.”
If you’re already a fan of Halloween bakes, you’ll also love our festive Ghost Oreo Balls and cozy Pumpkin Sugar Cookies with Cream Cheese Frosting. Both pair beautifully with these monster cookies for a full fall dessert spread.
What Are Halloween Monster Cookies?
At their core, Halloween Monster Cookies are jumbo, chewy cookies packed with oats, chocolate chips, and an outrageous mix of colorful candies. The “monster” part comes from the sheer size of the cookie and the over-the-top candy load. Traditionally, monster cookies go back to the 1970s, but Halloween gave them a new twist: instead of just M&Ms, bakers started adding candy eyes, spooky sprinkles, and whatever treats were left over from trick-or-treat bags.
What makes them so special is the nostalgic feel. For many of us, baking monster cookies meant raiding the pantry, tossing everything sweet into a bowl, and hoping for the best and somehow, it always worked. The appeal of this recipe lies in its messiness, its chaos, and its delightful taste.
Popularity, Comparison & Related Treats
Why Halloween Monster Cookies Are So Popular
If you’ve scrolled through TikTok or Pinterest lately, you’ve probably seen oversized cookies covered in candy eyes and neon sprinkles taking center stage. That’s the magic of Halloween Monster Cookies they’re not just delicious, they’re photo-ready.
Social media has made these cookies a seasonal sensation because they check all the boxes:
- Customizable: Toss in any leftover trick-or-treat candy think peanut butter chips, marshmallows, or even pretzels for crunch.
- Party-Perfect: Their bold colors and goofy eyes make them a hit on Halloween party trays.
- Share-Worthy: With dark cocoa dough and candy popping against it, they’re practically made for Instagram feeds.
And let’s be honest who doesn’t love a dessert that looks like it’s staring back at you?
Monster Cookies vs. Regular Cookies
Here’s a quick look at how Halloween Monster Cookies stand out from classic cookie recipes:
| Feature | Halloween Monster Cookies | Classic Cookies |
|---|---|---|
| Size | Jumbo, thick, and loaded with extras | Usually medium, uniform |
| Mix-ins | Oats, M&M’s, sprinkles, candy eyes, add-ins | Mostly chocolate chips or nuts |
| Texture | Chewy and chunky with lots of texture | Soft, chewy, or crisp, depending on recipe |
| Occasion | Perfect for Halloween & themed parties | Everyday treat or dessert staple |
| Look | Bright, spooky, fun — perfect for decorating | Classic golden brown with chips |
This makes Monster Cookies more of a holiday statement treat, while regular cookies are the all-year comfort snack.
Related Treats Worth Trying
If you’re craving more festive baking, try these fun recipes from our collection:
- Halloween Cauldron Cookies – cauldron-shaped treats filled with candy “bubbling over.”
- Heavenly Lemon Cookies – a bright, zesty cookie that balances all that chocolatey richness.
Both of these complement your Halloween Monster Cookies for a frightfully delightful dessert display.
Halloween Monster Cookies Ingredients: What You’ll Need
1- Dry Ingredients
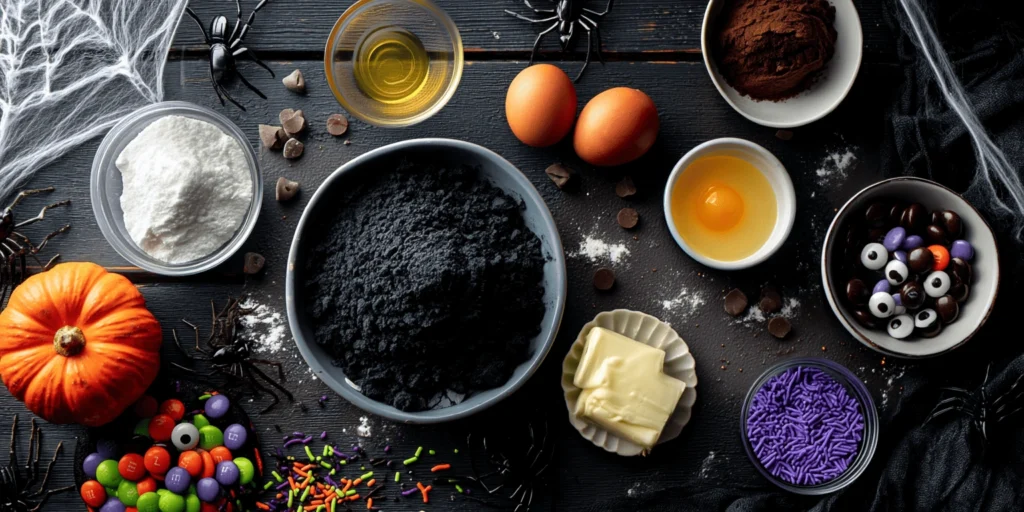
The base of these cookies begins with simple pantry staples. You’ll need 1 ¼ cups (155 g) of all-purpose flour, which provides structure, and ½ cup (40 g) of dark cocoa powder to give the dough its spooky, midnight color. To ensure they bake up perfectly, whisk in ½ teaspoon each of baking powder, baking soda, and fine sea salt. Together, these dry ingredients create a sturdy foundation with just the right amount of lift.
2- Wet Ingredients
The heart of any chewy cookie is a blend of butter and sugar. Start with ¾ cup (170 g) of softened unsalted butter, then beat it with ¾ cup (160 g) of packed light brown sugar and ¼ cup (50 g) of granulated sugar until pale and fluffy. This combination traps air and helps the cookies spread just enough while keeping their chewy center. Into this mixture, add two egg yolks at room temperature and a teaspoon of pure vanilla extract for richness and flavor depth.
3- Mix-ins & Decorations
What turns ordinary cookies into Halloween Monster Cookies are the festive extras. Fold in ¾ cup (170 g) of Halloween-colored M&M’s and 3 tablespoons of bright sprinkles in shades of orange, green, purple, and black. Finally, don’t forget the candy eyeballs, which give each cookie its playful, spooky personality. Keep a handful of extra candies and sprinkles aside, pressing them on top of the dough balls before baking ensures every cookie comes out colorful and eye-catching.
For those who like options, here’s a quick table of easy swaps:
| Ingredient | Swap Option |
|---|---|
| All-purpose flour | 1:1 gluten-free baking blend |
| Butter | Dairy-free margarine or coconut oil |
| Brown sugar | Coconut sugar or date sugar |
| Egg yolks | Flaxseed egg (1 tbsp flax + 3 tbsp water) |
| M&M’s | Dairy-free chocolate gems or chopped candy |
How to Make Halloween Monster Cookies Step by Step
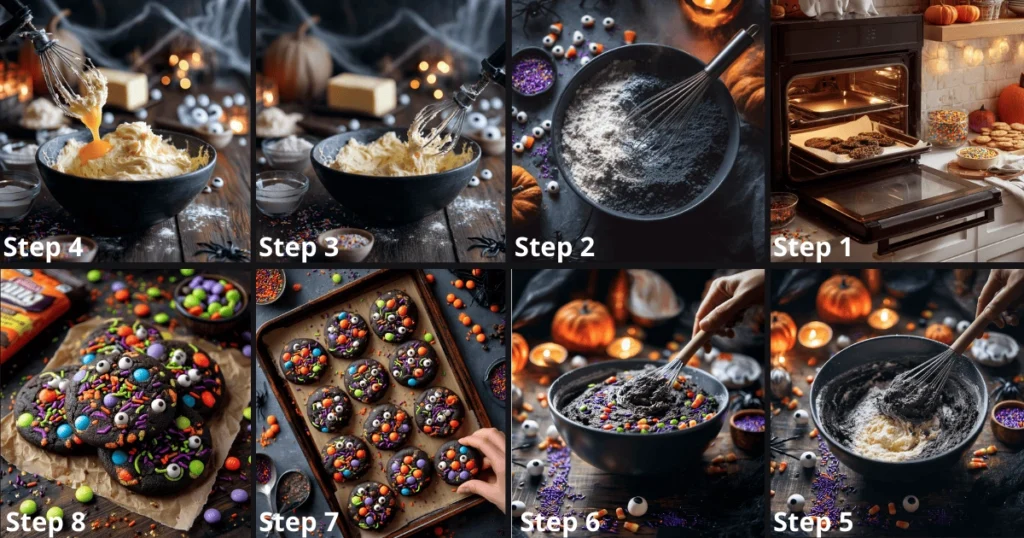
- Step 1: Preheat the Oven
Begin by preheating your oven to 350°F (175°C). Line two baking sheets with parchment paper. This simple step guarantees your cookies bake evenly and release without sticking.
- Step 2: Blend the Dry Ingredients
In a medium mixing bowl, combine the flour, cocoa powder, baking powder, baking soda, and salt using a whisk. This ensures the leavening is distributed evenly, giving your cookies the perfect rise.
- Step 3: Cream the Butter and Sugars
In a separate large bowl, beat the softened butter with both the brown sugar and granulated sugar. Keep mixing until the texture turns light and fluffy, about two minutes. This step is key to building that chewy base monster cookies are known for.
- Step 4: Add Egg Yolks and Vanilla
Incorporate the egg yolks and vanilla extract now. The yolks add richness while the vanilla deepens the flavor, making the dough taste almost like brownie batter.
- Step 5: Combine Wet and Dry
Gradually incorporate the dry mixture into the butter and sugar mixture. Blend on low speed until all traces of flour are gone. Be careful not to overmix the goal is a dough that’s just combined and ready for candy.
- Step 6: Fold in the Fun
With a spatula, gently fold in the Halloween M&M’s and sprinkles. This is where the magic happens every scoop of dough turns into a festive explosion of color.
- Step 7: Shape the Cookies
Using a medium cookie scoop (about 2 tablespoons), portion out dough balls and arrange them two inches apart on your lined baking sheets. Press extra candies, sprinkles, and candy eyeballs into the tops so each cookie looks delightfully spooky.
- Step 8: Bake and Cool
Bake for 10–12 minutes, just until the edges are set but the centers are still soft.Allow the cookies to sit on the sheet for five minutes prior to moving them to a wire rack. This cooling step helps the cookies hold their chewy texture.
📌 Pro Tip: To achieve bakery-style cookies, employ a round cookie cutter to reshape freshly baked cookies into tidy circles while they retain warmth.
Authority Tip
If you want to master your cookie technique, check out King Arthur Baking’s 10 Cookie Tips a trusted guide from one of the best baking resources online.
The Science Behind Halloween Monster Cookies
Baking is a blend of creativity and chemistry, and Halloween Monster Cookies are a perfect example. Every ingredient has a job to do, and understanding why they work helps explain why these cookies come out chewy, rich, and festive.
The addition of oats or cocoa powder is more than just flavor and color. Oats bring a hearty chew and help the dough hold extra mix-ins like candy and sprinkles without falling apart. Cocoa powder, especially black or dark cocoa, deepens the flavor and gives the cookies their signature spooky shade.
Butter and sugar are equally important. Creaming them together traps air in the dough, which helps the cookies rise slightly while staying tender. The ratio of brown sugar to white sugar is intentional: brown sugar provides moisture and chewiness, whereas white sugar helps achieve crisp edges.
Even the candies play a role in texture. Coated chocolates like M&M’s hold their shape during baking, adding pops of color and crunch, while candy eyes and sprinkles give surface-level decoration without altering the dough.
To understand why cookies sometimes bake up cakey instead of chewy, read Better Homes & Gardens – Why Cookies Turn Cakey, a simple breakdown of the baking science behind texture.
This combination of science and fun is what makes Halloween Monster Cookies reliable every time they’re as sturdy as they are festive.
Serving Suggestions & Styling
Halloween Monster Cookies are more than just a treat; they’re a centerpiece for spooky gatherings. How you serve them can turn a simple cookie into a memorable moment.
For parties, stack the cookies high on a dark cake stand, scattering extra candy eyes around the base for a playful touch. If you’re serving children, place them in cauldron-style bowls or spooky themed platters so they feel like part of the décor. Individually wrapping cookies in clear bags with orange ribbons also makes them an easy grab-and-go option for trick-or-treaters or school parties.
Styling matters if you want to capture that perfect photo for Pinterest or Instagram. Arrange a few cookies on a rustic wooden board with cobweb decorations in the background, or style them with candy corn, pumpkins, and Halloween sprinkles scattered around. A drizzle of melted white chocolate can even mimic cobwebs when swirled across the tops.
The beauty of these cookies is that they already have personality. Their bold colors, oversized size, and candy eyeballs make them naturally photogenic. With just a little creativity in presentation, they can stand out as the star dessert of any Halloween spread.
For something fruity and rich, our Blueberry Cheesecake Swirl Cookies add a colorful twist that pairs beautifully with chocolate-heavy Halloween bakes.”
Placement: After Serving Suggestions & Styling section (Part 4B), where you mention pairing cookies on dessert tables.
Variations of Halloween Monster Cookies
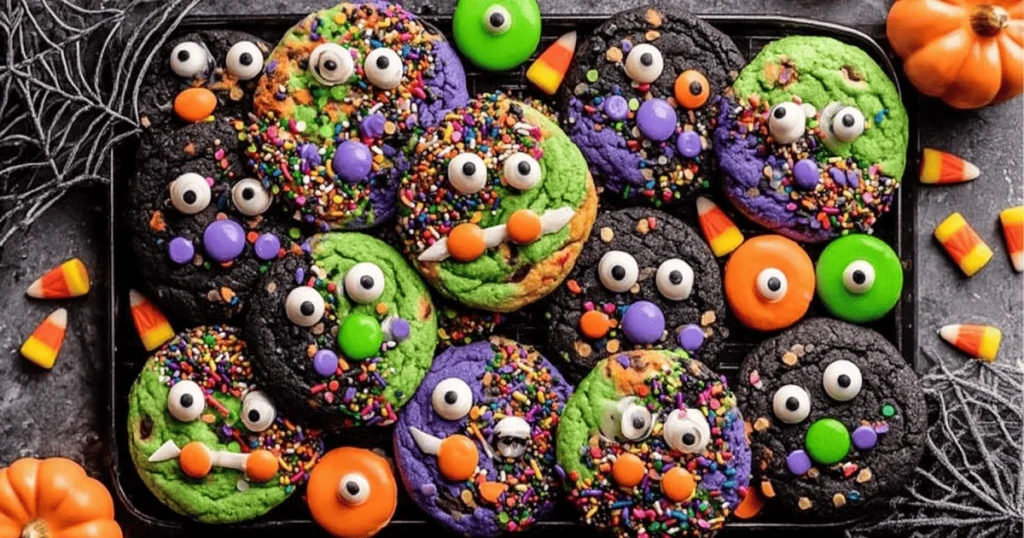
One of the best parts about Halloween Monster Cookies is how flexible they are. The base recipe is sturdy enough to handle plenty of creativity, which means you can adapt it to fit different diets, preferences, or even moods.
- No-Bake Version: Skip the oven altogether by making a no-bake version. Use oats, peanut butter (or sunflower seed butter for nut-free), honey, and crushed candy bars. Chill the mixture in scoops until firm for a quick, chewy treat.
- Sugar-Free Version: Replace granulated sugar with monk fruit sweetener or erythritol, and swap M&M’s for sugar-free chocolate chips. These substitutions create a better-for-you cookie that still feels indulgent.
- Gluten-Free Version: Use a 1:1 gluten-free baking blend in place of flour, and make sure your oats are certified gluten-free. The consistency remains chewy, and no one will notice the difference.
- Kid-Friendly Mini Bites: Make smaller, two-bite versions by using a teaspoon of dough per cookie. Kids love the mini size, and they bake faster, making them perfect for lunchbox surprises.
If fall flavors are your thing, try Apple Cider Whoopie Pie Cookies for a seasonal companion to your monster cookies
Indulgent Chocolate-Stuffed Version
For a decadent twist, press a square of brownie or a chocolate truffle into the center of each dough ball before baking. The result is a gooey, molten center that feels like a dessert upgrade.
These variations prove that Monster Cookies aren’t just for Halloween, they’re a versatile treat you can enjoy year-round, customized to fit any occasion.
Make-Ahead & Storage
Halloween Monster Cookies are party-friendly not just because of their look, but also because they can be made ahead of time. This makes them a stress-free option for busy Halloween weekends.
- Dough for Later: You can make the dough up to three days prior. Simply cover the bowl tightly with plastic wrap and refrigerate. Chilled dough also bakes into thicker cookies, which is a bonus if you like a chewy center.
- Freezer Instructions: For longer storage, scoop the dough into balls, place them on a tray, and freeze until firm. After they are firm, move the dough balls to a bag that can be stored in the freezer. They’ll keep for up to three months. When you’re ready to bake, place the frozen dough balls on a baking sheet and add an extra two minutes to the baking time.
- Storing Baked Cookies: After baking, Monster Cookies remain fresh for roughly five days when placed in an airtight container at room temperature. To keep them extra soft, tuck a slice of bread into the container the cookies will absorb the moisture and remain chewy.
- Thawing Tips: If you’ve frozen baked cookies, let them thaw at room temperature for about 30 minutes, or give them a quick 5-second zap in the microwave to bring back their fresh-from-the-oven softness.
With these storage options, you can enjoy Halloween Monster Cookies well beyond October 31st, whether you’re prepping ahead for a party or stashing a few for future cravings.
Troubleshooting & Expert Tips
Even with a dependable recipe, baking cookies can sometimes throw you a curveball. Here are common issues that may come up with Halloween Monster Cookies and how to fix them.
- Cookies Spreading Too Much: If your cookies bake flat instead of thick and chewy, the dough may be too warm. Chilling the dough for at least 30 minutes before baking helps the butter firm up, preventing excessive spread.
- Candy Melting or Bleeding Colors: Halloween M&M’s and candy eyes can sometimes crack or melt in the oven. A quick fix is to press a few extra candies into the tops of the cookies immediately after they come out of the oven. This not only looks better but keeps the colors vibrant.
- Dry or Crumbly Texture: Overmixing the dough or adding too much flour can make cookies dry. Be sure to spoon and level your flour instead of scooping directly from the bag, and mix only until the ingredients come together.
For more expert tricks straight from professional chefs, don’t miss Simply Recipes – Chefs Reveal Best Cookie Tricks, an easy-to-follow guide packed with practical tips.
- Uneven Baking: If some cookies come out darker than others, rotate your baking sheets halfway through baking. Using parchment paper also ensures even browning across the bottoms.
- Pro Tip for Added Chewiness: Replace a tablespoon of flour with cornstarch in the dry ingredients. This small change makes the cookies softer and chewier without altering the flavor.
With these tips, you’ll have consistent success every time, turning out Halloween Monster Cookies that look festive, taste incredible, and photograph beautifully.
Frequently Asked Questions About Halloween Monster Cookies
Can I freeze Halloween Monster Cookies?
Yes. You can freeze both the unbaked dough balls and the baked cookies. For dough, freeze on a tray until solid, then transfer to a bag for up to three months. For baked cookies, store in an airtight container and thaw at room temperature when ready to enjoy.
How do I keep the candy eyes from melting?
Candy eyes may soften during baking. To keep them looking sharp, press a few onto the cookies right after they come out of the oven. The residual heat will help them stick without melting.
What’s the best candy mix to use?
Halloween M&M’s are the classic choice, but you can add Reese’s Pieces, candy corn, or chopped chocolate bars. Just avoid candies that fully melt, like caramels, unless you want a gooey center.
Can I make these ahead of time for a party?
Absolutely. The dough can be refrigerated up to three days in advance or frozen for months. Baked cookies will stay fresh for about five days when stored in an airtight container.
Is there a gluten-free option?
Yes. Swap the all-purpose flour for a 1:1 gluten-free baking blend and use certified gluten-free oats if you’re adding them. The result is just as chewy and delicious.
Can I make mini versions for kids?
Definitely. Scoop teaspoon-sized portions of dough instead of tablespoons and reduce the bake time to 7–8 minutes. They’re bite-sized, fun, and perfect for little hands.
Conclusion: Why Halloween Monster Cookies Belong on Your Table
Halloween Monster Cookies are chewy, colorful, and endlessly customizable — the perfect treat to share during spooky season. Whether you make a classic batch, try a gluten-free twist, or go all out with a chocolate-stuffed version, these cookies always bring fun and flavor to the table.
For a full dessert spread, pair them with Ghost Oreo Balls or Pumpkin Sugar Cookies with Cream Cheese Frosting. Or branch out with fall favorites like Blueberry Cheesecake Swirl Cookies and Apple Cider Whoopie Pie Cookies.
Bake a batch, share them with friends, and let these playful cookies become your new Halloween tradition.
Print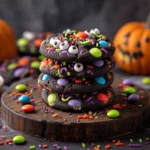
Halloween Monster Cookies | 8 Spooky Steps to Magic
- Total Time: 27 minutes
- Yield: 17 cookies
- Diet: Vegetarian
Description
Chewy, chocolatey Halloween Monster Cookies loaded with M&M’s, festive sprinkles, and candy eyeballs. A spooky, fun treat perfect for parties or trick-or-treat night.
Ingredients
Dry Ingredients
-
1 ¼ cups (155 g) all-purpose flour
-
½ cup (40 g) dark cocoa powder (or black cocoa)
-
½ tsp baking powder
-
½ tsp baking soda
-
½ tsp fine sea salt
Wet Ingredients
-
¾ cup (170 g) unsalted butter, softened
-
¾ cup (160 g) packed light brown sugar
-
¼ cup (50 g) granulated sugar
-
2 large egg yolks, room temperature
-
1 tsp pure vanilla extract
Mix-ins & Decorations
-
¾ cup (170 g) Halloween-colored M&M’s
-
3 tbsp festive sprinkles (orange, purple, green, black)
-
Candy eyeballs for decoration
-
Extra M&M’s and sprinkles for topping
Instructions
1️⃣ Preheat the Oven
Preheat oven to 350°F (175°C) and line two baking sheets with parchment paper.
2️⃣ Mix Dry Ingredients
In a medium bowl, whisk together flour, cocoa powder, baking powder, baking soda, and salt.
3️⃣ Cream Butter & Sugars
In a large bowl, beat softened butter with brown sugar and granulated sugar until light and fluffy, about 2 minutes.
4️⃣ Add Egg Yolks & Vanilla
Mix in egg yolks and vanilla extract until smooth.
5️⃣ Combine Wet & Dry
Gradually add dry ingredients to wet mixture, stirring just until combined.
6️⃣ Fold in the Fun
Fold in M&M’s and sprinkles with a spatula until evenly distributed.
7️⃣ Shape the Cookies
Scoop 2 tablespoons of dough per cookie onto prepared sheets, spacing 2 inches apart. Press extra candies and candy eyeballs on top.
8️⃣ Bake & Cool
Bake for 10–12 minutes until edges are set but centers remain soft. Cool on baking sheet 5 minutes, then transfer to wire rack.
📌 Pro Tip: Use a round cutter to shape cookies into perfect circles while still warm.
Notes
-
Chill dough for thicker cookies.
-
Add candy eyeballs after baking if you want them extra defined.
-
Store baked cookies in an airtight container for 5 days or freeze dough balls for up to 3 months.
- Prep Time: 15 minutes
- Cook Time: 12 minutes
- Category: Dessert
- Method: Baking
- Cuisine: American

