Mini Loaf Cakes Halloween | Ultimate Spooky Treats (2025)
The first time I made Mini Loaf Cakes Halloween was for a neighborhood block party, and they disappeared within minutes. The smell of chocolate filled the air, and the crunch of Oreos gave each bite a spooky twist.
More than just desserts, these cakes are edible decorations that capture the spirit of Halloween. They’re now my go-to every October simple, customizable, and always a crowd favorite. Inspired by seasonal black-and-orange Halloween recipe inspiration from Bon Appétit, they strike that magical balance of festive and delicious.
What Are Mini Loaf Cakes Halloween?
Mini Loaf Cakes Halloween are mini chocolate cakes baked in small containers and decorated with spooky toppings. Crushed Oreos turn into dirt, candy bones peek out of the “ground,” and gummy worms crawl across the top for a playful touch.
They’re a grown-up twist on nostalgic dirt cups, still fun and kid-friendly. Like the Easy Ghost Brownies on Kinsley Recipes, Mini Loaf Cakes Halloween are less about perfection and more about fun, creativity, and celebrating the season.
Why Mini Loaf Cakes Halloween Are Popular
Halloween desserts flood TikTok and Pinterest every October, but Mini Loaf Cakes Halloween stand out for being small, portable, and photo-ready. Like Pink Monster Cupcakes, they balance cute and creepy, yet their sturdy base makes decorating easier. Perfect for school events, office parties, or trick-or-treat gatherings, they’re convenient to serve and share.
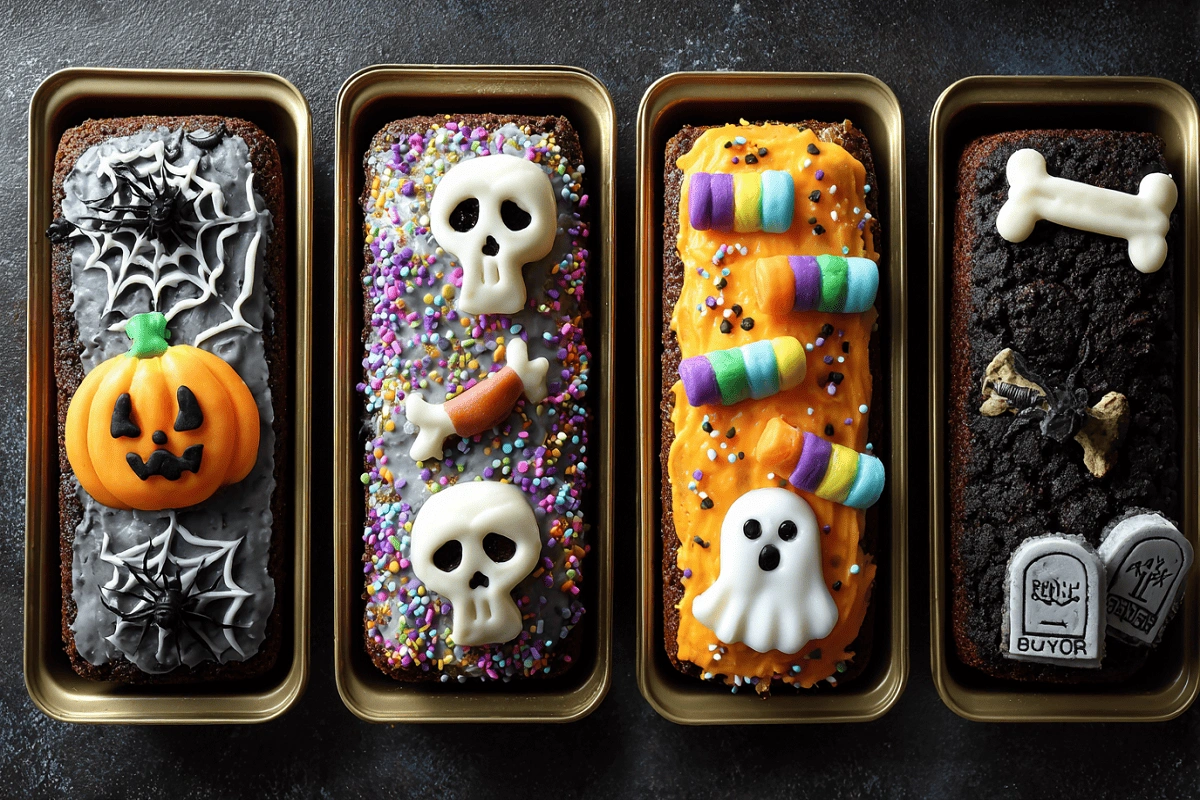
Each loaf can be customized from graveyards with candy bones to cheerful ghost toppings, and they always look striking. With dark Oreo crumbs, colorful sprinkles, and gooey chocolate, these cakes are made for social media and have quickly become a viral Halloween favorite.
Mini Loaf Cakes Halloween vs. Other Halloween Desserts
Mini Loaf Cakes Halloween are the sweet spot between cupcakes, brownies, and cake pops. Unlike cupcakes that need frosting skills, cake pops that take extra work, or brownies that limit decorations, mini loaves bake fast, hold their shape, and offer a perfect canvas. They’re sturdy, customizable, and easy to serve in single portions.
They’re also portion-friendly, which means no slicing or messy serving. Here’s a quick look at how they stack up:
| Dessert | Texture | Effort | Decoration Potential | Portability |
|---|---|---|---|---|
| Cupcakes | Light & fluffy | Medium | High | High |
| Brownies | Dense & chewy | Low | Low | Medium |
| Cake Pops | Soft inside, coated | High | High | Medium |
| Mini Loaf Cakes Halloween | Moist & sturdy | Low | High | High |
Ingredients for Mini Loaf Cakes Halloween
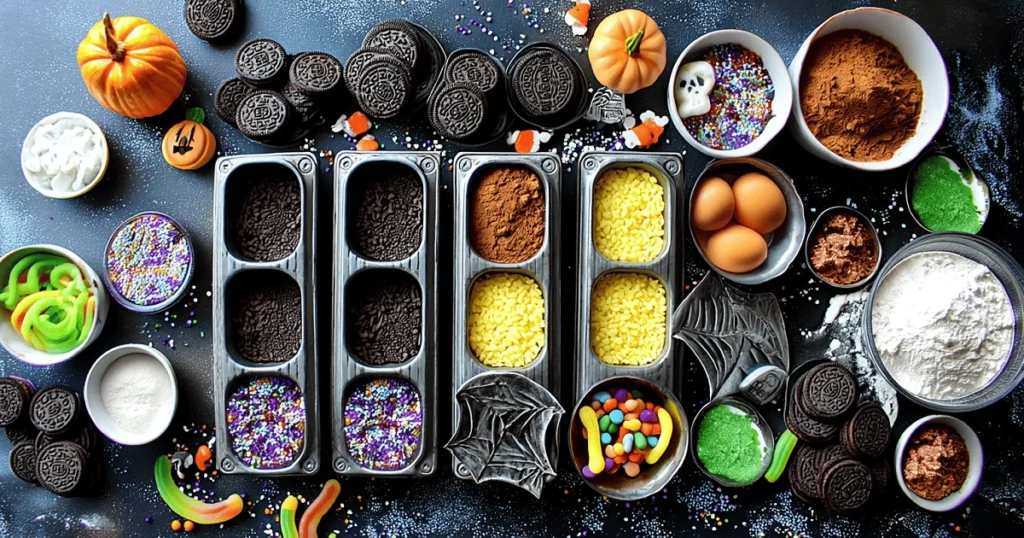
To create Mini Loaf Cakes Halloween, you’ll start with a rich chocolate cake base that’s soft, moist, and sturdy enough to hold plenty of spooky toppings. Think of this section as three parts: the cake itself, the decorations, and the optional add-ins that make each batch unique.
The Cake Batter
You’ll need 1 cup of all-purpose flour, ½ cup of unsweetened cocoa powder, 1 teaspoon of baking powder, ½ teaspoon of baking soda, and ½ teaspoon of salt for your dry mix. For the wet ingredients, gather ½ cup softened unsalted butter, ¾ cup granulated sugar, 2 large eggs, 1 teaspoon vanilla extract, and ½ cup milk. This combination bakes into a tender chocolate loaf that holds its shape while staying fluffy inside.
The Halloween Toppings
Once the cakes cool, the magic begins. Crush about 12 Oreos to make the “dirt” layer, sprinkle in ½ cup of Halloween-themed sprinkles, and add candy bones or gummy worms for a graveyard effect. Small plastic shovels or hand-shaped toppers make it even more festive, perfect for themed dessert tables.
Optional Add-Ins
Want to elevate the flavor? Stir in ½ cup mini chocolate chips, swirl in a layer of cream cheese for tang, or fold in chopped peanut butter cups for a decadent twist. Each variation adds personality and lets you customize the cakes for your crowd.
Substitution Table
| Ingredient | Standard | Swap Option |
|---|---|---|
| Flour | All-purpose | Gluten-free flour blend |
| Butter | Unsalted butter | Vegan or plant-based butter |
| Milk | Whole milk | Almond, oat, or soy milk |
| Sugar | Granulated sugar | Stevia or monk fruit sweetener |
| Oreos | Classic Oreos | Gluten-free Oreos or crushed chocolate grahams |
With your ingredients lined up, you’re ready to bake the base and prepare for the fun part: decorating your mini loaves into spooky edible masterpieces.

How to Make Mini Loaf Cakes Halloween
Making Mini Loaf Cakes Halloween is simple, fun, and perfect for bakers of all levels. Follow these steps to create moist chocolate loaves topped with spooky decorations that will wow every guest at your party.
1️⃣ Preheat and Prep
Set your oven to 350°F (175°C). Place your mini loaf containers on a sturdy baking sheet for support. Lightly grease each container or line with parchment for easy removal.
👉 Pro Tip: Always bake the loaves on a cookie sheet to prevent spills and ensure even heat distribution.
2️⃣ Mix the Dry Ingredients
In a medium bowl, whisk together 1 cup flour, ½ cup cocoa powder, 1 teaspoon baking powder, ½ teaspoon baking soda, and ½ teaspoon salt.
3️⃣ Cream Butter and Sugar
In a separate bowl, beat ½ cup softened butter with ¾ cup sugar until light and fluffy. Add 2 eggs and 1 teaspoon vanilla extract, mixing until smooth.
👉 Pro Tip: Use room-temperature eggs and butter for a smoother batter.
4️⃣ Combine Wet and Dry
Gradually add the dry mix to the wet ingredients, alternating with ½ cup milk. Stir gently until no lumps remain. If desired, fold in mini chocolate chips for extra indulgence.
5️⃣ Fill the Loaf Containers
Spoon batter into each loaf container, filling only halfway. This prevents overflow as the cakes rise in the oven.
👉 Pro Tip: Filling halfway also leaves room for toppings without the cakes collapsing.
6️⃣ Bake to Perfection
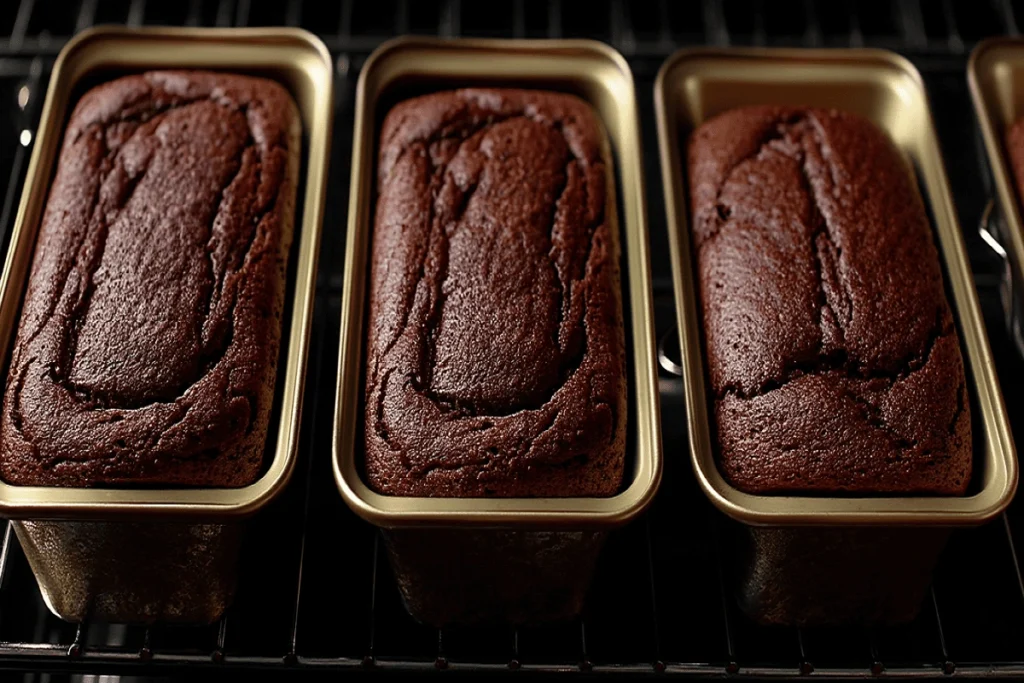
Bake for 18–22 minutes. Check doneness by inserting a toothpick in the center it should come out clean.

7️⃣ Cool and Decorate
Allow loaves to cool completely. Top with crushed Oreos for dirt, sprinkle with Halloween candies, and finish with gummy worms, bones, or fun toppers.
Just like the Easy Ghost Brownies from Kinsley Recipes, these little cakes are as much about decorating as they are about baking. Each one becomes a mini edible art project that’s perfect for Halloween celebrations.
The Science Behind Mini Loaf Cakes Halloween
Mini Loaf Cakes work so well for Halloween because of their size and texture. Small loaf pans bake evenly, avoiding dry edges or undercooked centers. Filling them halfway prevents overflow and gives the batter room to rise.
The Oreo “dirt” adds more than looks its crunch contrasts with the soft cake, and the fat in the cookies keeps them from turning soggy. Unlike cupcakes that can dry out, mini loaves stay moist and sturdy, holding toppings perfectly while delivering a satisfying bite.
Serving Suggestions & Styling
Mini Loaf Cakes Halloween shine brightest when styled with spooky creativity. Try these serving ideas to make your desserts unforgettable:
• Party Centerpiece – Display the mini loaves in cauldrons, coffin-shaped trays, or even on a bed of candy corn. This creates a dramatic graveyard scene that doubles as edible décor for your table.
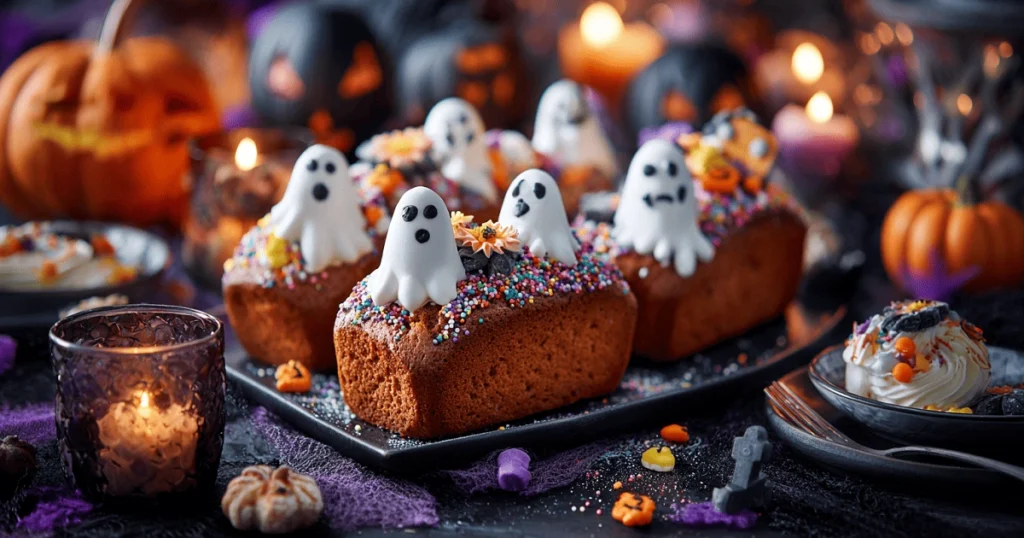
• Whipped Cream Ghosts – Pipe whipped cream or white frosting into playful ghost shapes on each loaf. Add mini chocolate chips for eyes to give your ghosts personality and a festive touch.
• Colorful Drizzle – Drizzle orange, purple, or black icing across the Oreo “dirt” to add bold color contrast. It’s a simple way to make the cakes stand out in photos and at parties.
• Edible Decorations – Sprinkle on candy bones, gummy worms, or press in tiny shovel toppers. These details transform each loaf into a spooky mini graveyard scene.
• Wrapped Favors – Wrap loaves individually in clear treat bags tied with orange or black ribbon. They make perfect party favors that guests can take home and enjoy later.
• Pairing Ideas – Serve alongside rich treats like Homemade Vampire Fudge for variety. For more inspiration, browse Food Network’s Halloween party serving ideas to elevate your dessert table.

Variations of Mini Loaf Cakes Halloween
Mini Loaf Cakes Halloween are endlessly customizable, making them easy to adapt for dietary needs, flavor preferences, or party themes. Here are some fun ways to switch them up:
• No-Bake Version – Skip the oven entirely by using store-bought pound cake or brownies as your base. Cut into loaf-sized pieces, then decorate with crushed Oreos, candy bones, and gummy worms for a quick and festive treat.
• Gluten-Free Swap – Use a 1:1 gluten-free flour blend in the batter and replace Oreos with gluten-free versions or crushed chocolate grahams. The texture stays moist while making the recipe safe for gluten-sensitive guests.
• Sugar-Free Option – Sweeten the batter with monk fruit or stevia and top with sugar-free sprinkles. This lighter version keeps the festive look without the extra sugar.
• Kid-Friendly Style – Make it fun and playful by topping with gummy worms, candy eyeballs, or brightly colored Halloween sprinkles. Kids love decorating their own loaves.
• Indulgent Chocolate Overload – Take it up a notch with a rich chocolate ganache drizzle, then add the Oreo dirt and candies. This version is perfect for chocoholics who want a decadent Halloween dessert.
Make-Ahead & Storage
Mini Loaf Cakes Halloween are a host’s dream because they can be prepared in advance without losing flavor or texture. Here’s how to store them for the best results:
• Room Temperature Storage – Bake the loaves 1–2 days ahead of your event. Once cooled, place them in an airtight container at room temperature. This keeps them soft and moist while preserving their fresh-baked taste.
• Refrigerator Storage – If you prefer a longer hold before decorating, store the cooled cakes in the fridge. Wrap them tightly in plastic wrap to lock in moisture.
• Freezer Storage – For longer storage, let the cakes cool completely, then wrap each loaf tightly in plastic wrap and place in a freezer-safe bag. They’ll stay fresh for up to 2 months.
• Thawing – When ready to serve, thaw the loaves overnight in the refrigerator for the best texture.
• Decorating Timing – Always wait to add Oreo dirt, sprinkles, or candies until just before serving. This keeps toppings crisp, colorful, and party-ready.
Troubleshooting & Expert Tips
Even the best bakers run into little issues. Here’s how to handle the most common problems when making Mini Loaf Cakes Halloween:
• Cracked Tops – Don’t worry if the loaves crack while baking. Once you cover them with crushed Oreos, the imperfections are hidden, and the cakes still look spooky and delicious.
• Soggy Toppings – To keep decorations crisp, wait until the cakes are completely cool before adding sprinkles, candy bones, or gummy worms. Always decorate just before serving for the freshest look.
• Uneven Baking – If some loaves rise faster than others, reduce the oven temperature by 10–15 degrees and bake a few extra minutes for even results.
• Dry Texture – Avoid overmixing the batter after adding flour, which can make the cakes dense. Stick to gentle stirring for a tender crumb.
• Decoration Inspiration – For more topping ideas, check out Kinsley Recipes’ Halloween Cauldron Cookies. Their colorful candy decorations can easily be adapted for mini loaves.
FAQ: Mini Loaf Cakes Halloween
Can I make these without Oreos?
Yes! Replace Oreos with crushed chocolate graham crackers or brownie crumbs. For another spooky option, try Kinsley Recipes’ Ghost Oreo Balls.
What size containers work best?
Mini loaf pans, sturdy paper baking trays, or small foil containers hold their shape well and make decorating easier.
Can I freeze decorated cakes?
It’s best to freeze undecorated loaves. Add Oreos, sprinkles, and candy toppings only after thawing to keep them fresh and crisp.
How do I prevent overbaking?
Check your cakes at the 18-minute mark. Insert a toothpick in the center if it comes out clean, they’re ready.
What’s the best gluten-free substitute?
Use a 1:1 gluten-free flour blend and gluten-free Oreos. This keeps the cakes moist while making them safe for gluten-sensitive guests.
Conclusion
Mini Loaf Cakes, Halloween are the ultimate spooky bakes made simple. With their moist chocolate base, crumbly Oreo dirt, and playful decorations, they’re a dessert that’s as fun to create as it is to serve. These mini loaves strike the perfect balance between ease and creativity, making them ideal for parties, family gatherings, or even school events.
The best part is how customizable they are. Whether you try a gluten-free swap, a no-bake shortcut, or an indulgent chocolate overload, there’s a version for everyone.
Pair them with other festive recipes like Halloween Monster Cookies to build a dessert spread that guests won’t forget. Bake a batch this Halloween, and don’t forget to share your spooky creations with us on Instagram or Pinterest!
Print
Mini Loaf Cakes Halloween | Ultimate Spooky Bakes Made Simple
- Total Time: 35 minutes
- Yield: 8 mini loaves
- Diet: Vegetarian
Description
Mini Loaf Cakes Halloween are moist chocolate cakes baked in small loaf containers and decorated with Oreo dirt, candy bones, gummy worms, and sprinkles. Easy to make, customizable, and perfect for spooky parties or family fun.
Ingredients
-
1 cup all-purpose flour
-
½ cup unsweetened cocoa powder
-
1 teaspoon baking powder
-
½ teaspoon baking soda
-
½ teaspoon salt
-
½ cup unsalted butter, softened
-
¾ cup granulated sugar
-
2 large eggs
-
1 teaspoon vanilla extract
-
½ cup milk
-
½ cup mini chocolate chips (optional)
-
12 Oreos, crushed
-
½ cup Halloween sprinkles
-
Candy bones, gummy worms, or ghost toppers for decoration
Instructions
1️⃣ Prepare the Batter
• Preheat oven to 350°F (175°C). Place mini loaf containers on a baking sheet.
• Grease or line containers with parchment.
2️⃣ Mix Dry Ingredients
• In a medium bowl, whisk together flour, cocoa, baking powder, baking soda, and salt.
3️⃣ Mix Wet Ingredients
• In a separate bowl, beat butter and sugar until fluffy. Add eggs and vanilla, mixing well.
4️⃣ Combine
• Add dry ingredients to wet mixture in batches, alternating with milk. Stir until smooth.
5️⃣ Fill Containers
• Spoon batter into each container, filling halfway. Add chocolate chips if using.
6️⃣ Bake
• Bake 18–22 minutes. Test with toothpick; it should come out clean.
7️⃣ Decorate
• Cool completely, then top with crushed Oreos, sprinkles, and candy decorations.
Notes
-
Always fill containers only halfway to prevent overflow.
-
Decorate just before serving to keep toppings crisp.
-
Add ganache drizzle for a decadent variation.
- Prep Time: 15 minutes
- Cook Time: 20 minutes
- Category: Dessert
- Method: Baking
- Cuisine: American

