

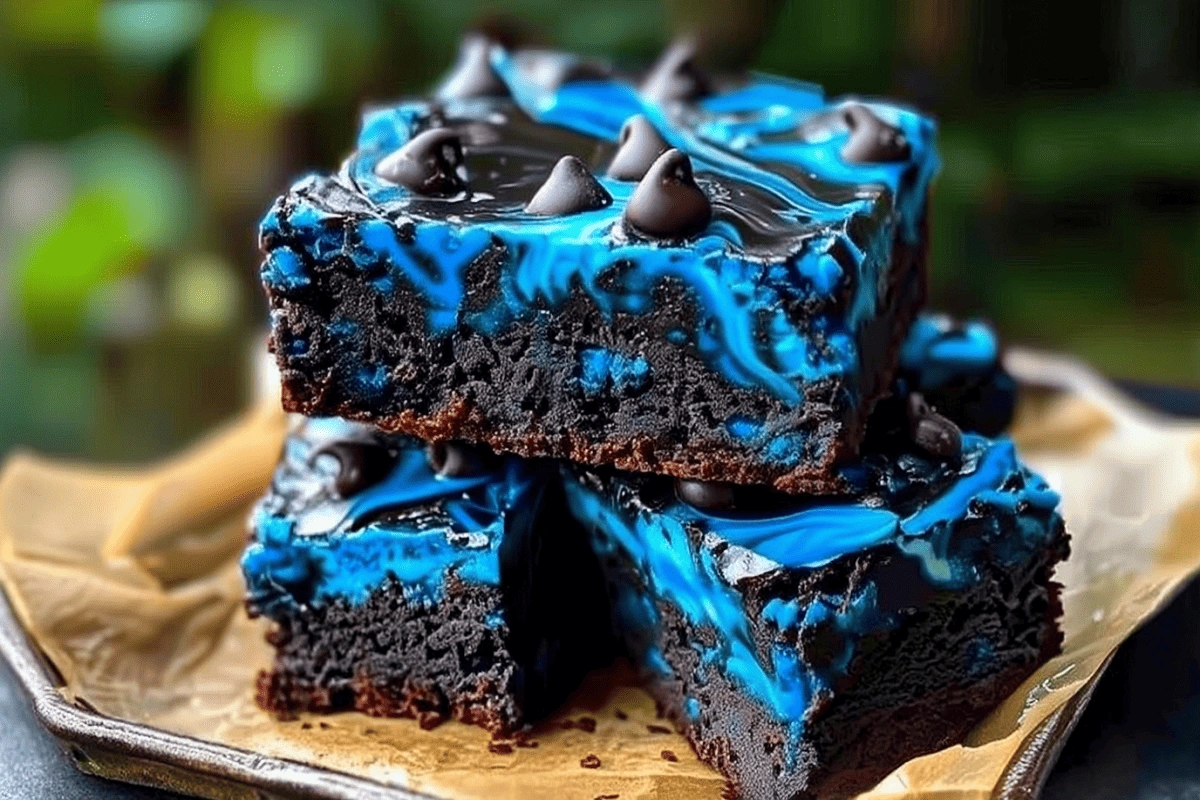
Blue Velvet Brownies – The Ultimate Gooey Dessert With a Bold Twist
Rich, vibrant, and totally unforgettable Blue Velvet Brownies are turning heads and satisfying cravings with every fudgy bite. Inspired by the iconic red velvet cake but dyed in bold sapphire hues, these brownies are the perfect fusion of eye-catching color and melt-in-your-mouth texture. Whether you’re baking for a party, a themed baby shower, or just craving something new, blue velvet brownies offer the wow factor with every slice.
In this article, you’ll discover what makes these brownies so uniquely satisfying from the velvety cocoa base to that luscious Oreo truffle topping. We’ll guide you through the best ingredients, expert baking tips, topping ideas, and even freezer-friendly hacks. Plus, we’ll answer the most frequently asked questions like whether you can use liquid food coloring or how far in advance you can make them.
Don’t miss our tropical spin on classic sweets in this Pineapple Heaven Cake with Caramel Glaze a great addition to your dessert table.
What Are Blue Velvet Brownies?
The Origin and Evolution of Velvet Desserts
The term “velvet” in baking has long been associated with ultra-moist, tender-crumbed cakes made with buttermilk and a touch of vinegar. While red velvet became famous in Southern kitchens and bakeries during the mid-20th century, blue velvet is its vibrant sibling a modern reinvention that leans heavily on visual drama while preserving that signature cocoa-rich flavor.
Blue velvet brownies build on this tradition but in brownie form. Instead of a tall, layered cake, you’re treated to dense, chewy bars that pack all the moisture and richness into each bite.
What Makes Blue Velvet Different from Red Velvet?
While red velvet usually gets its color from a blend of natural cocoa and red dye, blue velvet brownies swap out the red for bold blue coloring usually gel-based for intensity. The flavor is still mildly chocolatey and buttery but can be deepened with extra cocoa or dark chocolate chips for a more decadent twist.
The difference isn’t just visual. Blue velvet often signals a themed occasion: baby showers, gender reveals, or anything requiring a “cooler” palette. It’s dessert but make it aesthetic.
Visual Appeal: Why the Blue Hue Wins Hearts
Let’s face it color matters, especially in desserts made for sharing or photographing. Blue Velvet Brownies stand out on any dessert table, picnic plate, or Instagram feed. The vivid sapphire hue, contrasted with white chocolate chips, Oreo truffle layers, or cream cheese swirls, makes this dessert irresistible before the first bite.
Just like in our Cookie Monster Cinnamon Rolls, blue color adds a playful charm that invites people of all ages to dig in.
Print
Blue Velvet Brownies – The Best Gooey Dessert Recipe (2025)
- Total Time: 55 minutes
- Yield: 12 servings
- Diet: Vegetarian
Description
💙🍫 Blue Velvet Brownies are here to take your dessert game to another dimension!
Think classic fudgy brownies—but with bold color and a dreamy blue frosting swirl. These brownies don’t just taste incredible—they look like a galaxy on a plate. Rich cocoa flavor, melt-in-your-mouth texture, and a mesmerizing finish. Perfect for themed parties, bake sales, or just showing off at dessert time.
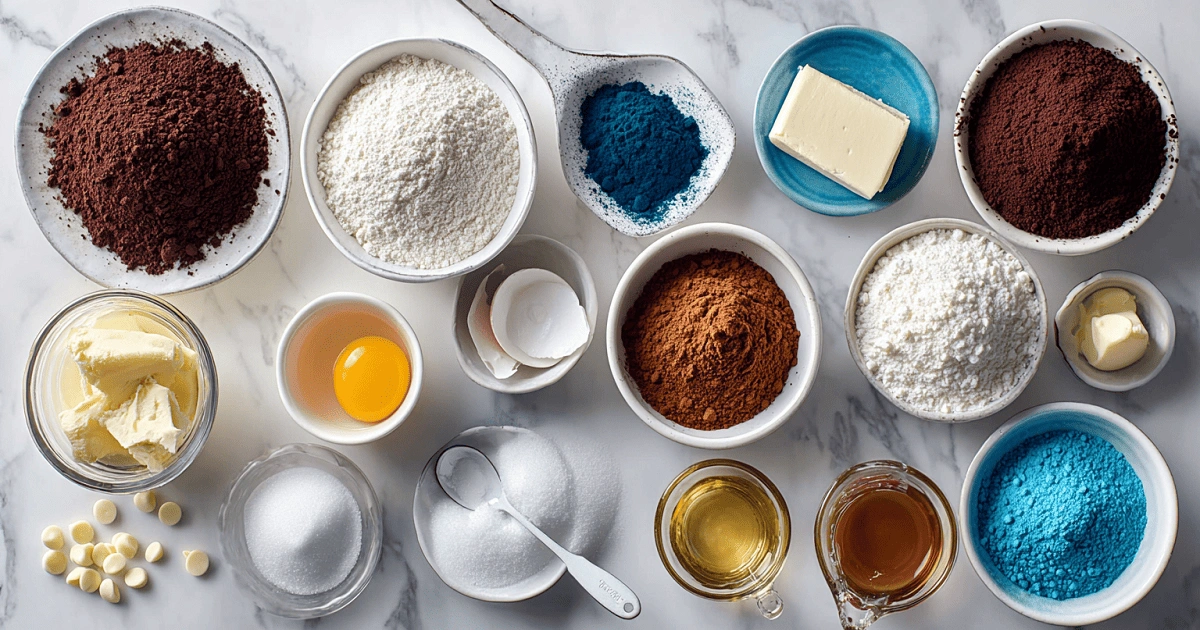
Ingredients
- 1 cup unsalted butter
• 1½ cups granulated sugar
• ¾ cup unsweetened cocoa powder
• 4 large eggs
• 1 tsp vanilla extract
• 1 tsp blue gel food coloring
• ¾ cup all-purpose flour
• ½ tsp salt
• ½ tsp baking powder
• ½ cup chocolate chips (plus more for topping)
Frosting Swirl:
• 1 cup vanilla frosting
• Blue gel coloring (1–2 drops)
• Black gel coloring (optional for galaxy effect)
Instructions
1️⃣ Make the Batter:
In a saucepan, melt butter. Remove from heat and stir in sugar, cocoa powder, and blue coloring. Beat in eggs one at a time, then add vanilla.
2️⃣ Fold in Dry Ingredients:
Mix in flour, baking powder, and salt just until combined. Fold in chocolate chips.
3️⃣ Bake:
Pour batter into a greased 9×9 pan. Bake at 350°F (175°C) for 25–30 mins. Cool completely.
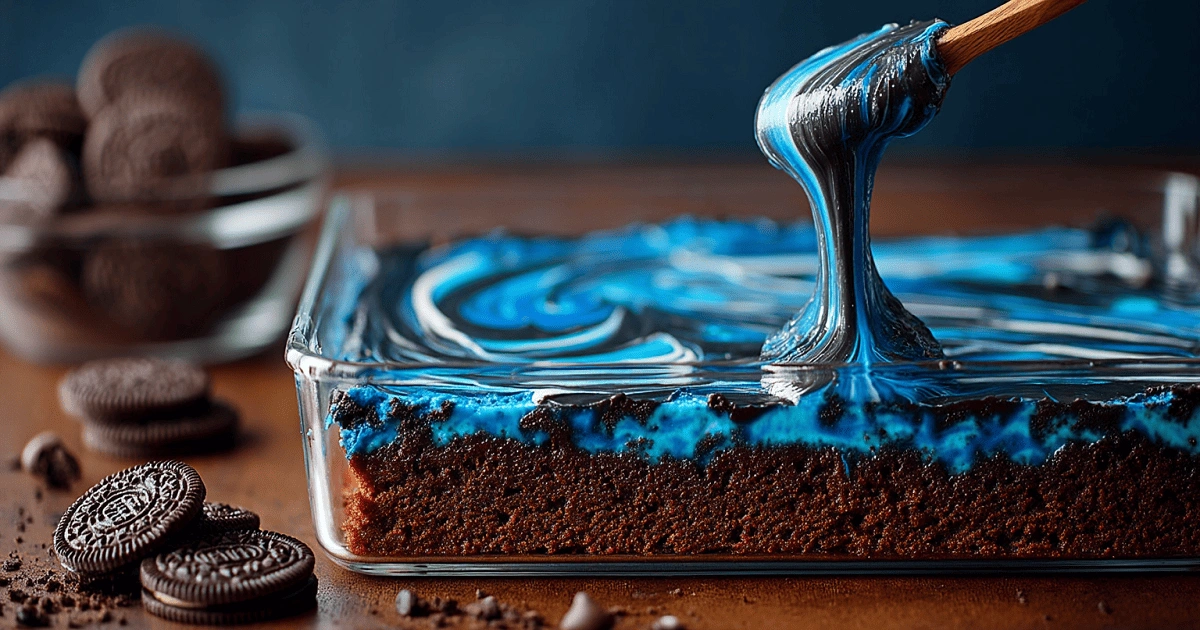
4️⃣ Swirl Frosting:
In a small bowl, mix frosting with blue and black food coloring. Drop spoonfuls onto the cooled brownies and swirl using a toothpick. Sprinkle extra chocolate chips on top.
5️⃣ Chill & Slice:
Refrigerate for 15–20 minutes to set frosting, then cut into squares.
Notes
-
Use gel food coloring for best results. Liquid food dyes can dilute the batter and produce dull colors.
-
For a richer texture, try adding cream cheese swirls or a layer of Oreo truffle filling before baking.
-
Don’t overbake! Brownies continue to cook as they cool. Remove from oven when the center is still slightly soft.
-
Cool completely before slicing for clean edges, or refrigerate for 30 minutes prior to serving.
-
Make-ahead tip: Blue Velvet Brownies can be baked a day in advance. Store in an airtight container at room temperature for up to 3 days, or freeze for up to 2 months.
-
Customize toppings with white chocolate chips, chopped nuts, sprinkles, or caramel drizzle depending on the occasion.
-
These brownies are a stunning choice for baby showers, birthdays, holidays, and themed events.
- Prep Time: 20 minutes
- Cook Time: 35 minutes
- Category: Dessert
- Method: Baking
- Cuisine: American
Nutrition
- Serving Size: 1 brownie (approx. 2.5"x2.5")
- Calories: 310 kcal
- Sugar: 26 g
- Sodium: 160 mg
- Fat: 16 g
- Saturated Fat: 9 g
- Unsaturated Fat: 6 g
- Trans Fat: 0.2 g
- Carbohydrates: 38 g
- Fiber: 2 g
- Protein: 3.5 g
- Cholesterol: 45 mg
Keywords: Brownie Recipes, Party Desserts, Fudgy Bars, Galaxy Treats, Blue Desserts, Colorful Bakes, Bake Sale Favorites, Chocolate Recipes, Trending Sweets
Core Ingredients in Blue Velvet Brownies
Cocoa Powder vs. Melted Chocolate: Which Base Wins?
The foundation of every delicious batch of Blue Velvet Brownies is the chocolate element but in this case, cocoa plays a different role than it does in traditional chocolate brownies. Instead of melted chocolate, this recipe calls for unsweetened natural cocoa powder, which adds a subtle chocolate flavor without darkening the batter too much.
If you use Dutch-processed cocoa instead of natural cocoa, it may interact with other ingredients and alter the vibrant blue hue, sometimes resulting in gray or green tones. That’s why choosing the right type of cocoa is essential for both flavor and visual impact.
Need help deciding which cocoa is best? King Arthur Baking explains the differences between cocoa types and how each reacts in baking recipes. Their guide is incredibly useful for understanding how acidity affects color and texture in baked goods like these brownies.
For added richness, you can fold in white chocolate chips or swirls of cream cheese just like we do in our popular Hot Fudge Brownie Bread.
The Role of Buttermilk and Vinegar in Texture
Buttermilk and vinegar are what give Blue Velvet Brownies their signature soft crumb. The acid from the vinegar reacts with baking soda to create a slight lift without making the brownies cakey. Buttermilk adds moisture and tang, which pairs beautifully with the mellow cocoa flavor.
If you don’t have buttermilk on hand, you can easily make your own by adding 1 tablespoon of white vinegar or lemon juice to ¼ cup of milk. Let it sit for 5–10 minutes before using.
Why Gel Food Coloring Is a Game-Changer
To get that rich sapphire-blue finish, gel food coloring is your secret weapon. Unlike liquid food dyes, which are diluted and can thin out your batter, gel coloring is concentrated and keeps your batter thick and rich while delivering bold color.
According to the FDA’s official guidance on color additives, approved synthetic food colors are safe for baking and undergo strict testing. This makes gel coloring a smart and safe choice for bold desserts like Blue Velvet Brownies.
Add just a small amount a toothpick dab or two and adjust until you achieve your desired hue. Combine the coloring after mixing your wet ingredients to see how it interacts with the cocoa and buttermilk base for best control.

Step-by-Step Blue Velvet Brownie Recipe
Ingredients Breakdown and Substitutions
To create irresistibly vibrant Blue Velvet Brownies, start with quality ingredients that build structure, flavor, and color. These brownies stand out not just for their deep blue hue, but for their uniquely soft, cocoa-infused texture that sets them apart from traditional brownies.
Here’s what you’ll need to whip up the perfect batch of Blue Velvet Brownies:
| Ingredient | Purpose | Substitute Option |
|---|---|---|
| All-purpose flour (1 cup) | Forms the base structure | Gluten-free 1:1 blend |
| Unsweetened cocoa powder (2 tbsp) | Delivers mild chocolate flavor | Carob powder |
| Baking soda (¼ tsp) | Adds light lift through reaction | Skip if not using buttermilk or vinegar |
| Salt (¼ tsp) | Balances the richness | Sea salt or pink salt |
| Granulated sugar (¾ cup) | Sweetens and helps crust formation | Coconut sugar (less refined) |
| Eggs (2 large) | Binds the batter | Flax eggs for vegan version |
| Unsalted butter (½ cup) | Adds richness and moisture | Coconut oil or plant-based margarine |
| Buttermilk (¼ cup) | Ensures that velvet softness | Milk + vinegar (DIY buttermilk) |
| White vinegar (½ tsp) | Reacts with soda for a tender crumb | Lemon juice |
| Vanilla extract (1 tsp) | Deepens flavor | Almond or coconut extract |
| Gel blue food coloring | Creates vibrant color | No substitute; avoid liquid coloring |
Optional Add-ons for your Blue Velvet Brownies:
-
White chocolate chips or chunks
-
Crushed Oreo cookies
-
Swirled cream cheese
These ingredients work in harmony to give your Blue Velvet Brownies a tender yet chewy texture, rich cocoa base, and that iconic blue color. And if you’re a fan of contrasting textures, pair these with our indulgent Southern Chocolate Cobbler a fudgy dream in its own right.
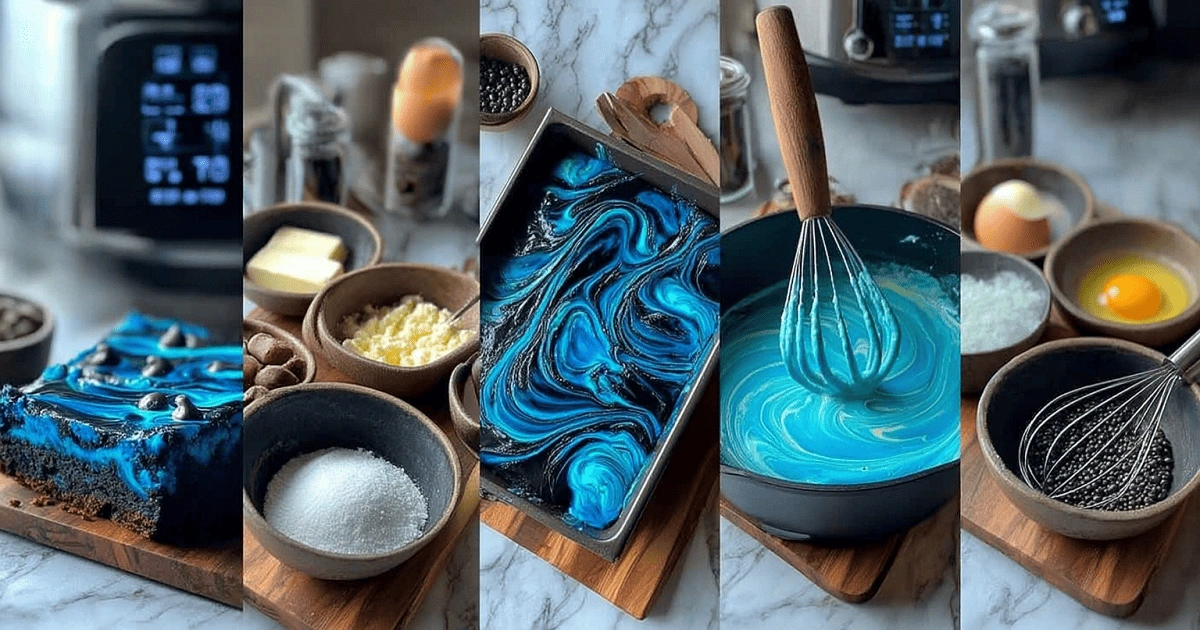
Preparing the Batter for Optimal Texture
Follow these steps closely to ensure your Blue Velvet Brownies turn out just right moist, flavorful, and never overbaked:
-
Preheat your oven to 325°F (165°C). Line an 8×8-inch baking pan with parchment paper, allowing overhang for easy removal.
-
In a medium bowl, whisk together flour, cocoa, baking soda, and salt.
-
In a separate large bowl, cream butter and sugar until light and fluffy, about 2 minutes.
-
Beat in eggs, one at a time, then mix in vanilla extract.
-
Stir in buttermilk, white vinegar, and gel blue food coloring until fully incorporated.
-
Gradually fold dry ingredients into wet, just until combined.
-
Gently fold in any add-ins like white chocolate chips or crushed Oreos.
The batter should be thick and richly colored. Don’t overmix it will make your Blue Velvet Brownies dense and gummy rather than soft and fudgy.
Baking Tips: Temperature, Timing, and Tools
Perfect Blue Velvet Brownies are baked low and slow for that signature gooey texture in the center and slightly crisp edges. Here’s how to get it right:
-
Use a light-colored metal or glass baking pan to avoid overbrowning the bottom.
-
Bake at 325°F for 30–35 minutes, checking around the 28-minute mark.
-
A toothpick inserted 2 inches from the edge should come out with moist crumbs, not wet batter.
Cool your Blue Velvet Brownies in the pan for 15 minutes, then lift them out and let them finish cooling on a wire rack. For clean edges when slicing, chill the pan in the fridge for 30 minutes before cutting.
Need a light snack to munch on while these cool? Check out our Cinnamon Sugar Air Fryer Banana Chips simple, crisp, and sweet.
Oreo Truffle Layer – Making It Irresistible
Why Oreo Truffle Pairs Perfectly with Blue Velvet Brownies
If you’re looking to take your Blue Velvet Brownies to the next level, layering them with an Oreo truffle mixture is the move. This rich, creamy addition adds a cookies-and-cream contrast that perfectly complements the vibrant cocoa base of the brownies. It’s decadent, nostalgic, and adds both visual and flavor contrast to the blue velvet layer underneath.
The result? A double-layered dessert bar that looks gourmet but is shockingly easy to prepare. Think of it as a hybrid between brownies, truffles, and cheesecake bars — dense, creamy, and unforgettable.
Adding an Oreo truffle layer gives these Blue Velvet Brownies a gooey texture reminiscent of our fan-favorite Hot Fudge Brownie Bread, but with a cookies-and-cream twist.
Crushing Methods: Whole Oreos vs. Store-Bought Crumbs
You can go about the truffle layer two ways: crush your own Oreos or use pre-made Oreo crumbs. Each method has its pros and cons, depending on your time and texture preferences.
| Method | Texture | Flavor Control | Best For |
|---|---|---|---|
| Crushing Whole Oreos | Coarse, slightly chunky | Higher – includes filling | Homemade texture, richer creaminess |
| Store-Bought Oreo Crumbs | Fine, uniform | Slightly less dynamic | Quick prep, cleaner layering |
For best results, use a food processor if crushing whole Oreos. If you prefer a finer, neater layer (especially if making ahead or freezing), the store-bought version works just as well.
How to make the truffle layer:
-
20–25 whole Oreos, crushed
-
4–6 oz cream cheese, softened
-
Mix until smooth and spreadable, then gently layer over your cooled or partially baked Blue Velvet Brownies.
Chilling before spreading helps prevent tearing or dragging through the brownie layer.
Layering Tips for a Smooth Finish
Once your Blue Velvet Brownies are baked and slightly cooled (or if you’re baking them with the truffle layer in the final 10 minutes), it’s time to layer:
-
Spread the Oreo truffle evenly across the top using a silicone spatula.
-
Chill for 30–60 minutes to let the layer firm up.
-
Add optional toppings like crushed Oreos, a white chocolate drizzle, or a dusting of powdered sugar.
For an extra fancy finish, try using piping bags to swirl cream cheese or colored icing over the top like we did with playful designs in our Cookie Monster Cinnamon Rolls.
When you cut into these brownies, you’ll see that striking blue base, rich black truffle center, and whatever topping you’ve chosen a triple-threat dessert bar.
Toppings, Add-ons & Creative Variations
White Chocolate Drizzle and Cream Cheese Swirl Options
One of the most exciting things about Blue Velvet Brownies is how easily you can dress them up. A simple white chocolate drizzle offers contrast in both flavor and color, highlighting the bold blue hue beneath. Just melt ½ cup of white chocolate chips with a teaspoon of coconut oil, then drizzle using a spoon or piping bag.
Another favorite option? A cream cheese swirl. For this, mix softened cream cheese with a little powdered sugar and vanilla extract, then dollop and swirl it over the brownie batter before baking. The result: rich, tangy ribbons that cut through the sweetness.
Nuts, Sprinkles, and Holiday Themes
Want texture? Add chopped pecans or walnuts for crunch. Want fun? Use red, silver, or white sprinkles to create themed brownies for holidays or special occasions. You can even dye your cream cheese swirl in coordinating colors for 4th of July or gender reveal treats.
Customizing for Birthdays, Gender Reveals & More
Blue Velvet Brownies are a go-to treat for themed events. Add gold dust, edible glitter, or colorful sprinkles to match your party décor. For gender reveals, try hiding pink or blue chocolate candies inside the batter. These brownies don’t just taste amazing — they’re part of the celebration.
Storing, Freezing & Making Ahead
How to Store for Freshness Without Sogginess
To keep your Blue Velvet Brownies fresh, store them in an airtight container at room temperature for up to 3 days. Line the container with parchment paper to avoid condensation and soggy bottoms.
Freezer-Friendly? Yes, Here’s How
Yes — Blue Velvet Brownies freeze beautifully. Slice and wrap individual portions in plastic wrap, then place in a freezer-safe container. They’ll keep for up to 2 months. Thaw overnight in the fridge or at room temperature for 30–45 minutes before serving.
Make-Ahead Tips for Parties and Special Occasions
You can fully prepare Blue Velvet Brownies 1–2 days in advance. For best texture, wait to add toppings like frosting, cream cheese swirl, or truffle layers until a few hours before serving. That way, they stay bold, moist, and photo-ready.
Serving Ideas and Presentation Tips
Perfect Plating for Instagram-Worthy Slices
Serving Blue Velvet Brownies is all about visual appeal. Their striking color makes them a standout on any dessert table, but presentation can take them from great to unforgettable. Use a clean, sharp knife to cut even squares or rectangles. Wipe the blade between cuts to keep edges tidy and colors vibrant.
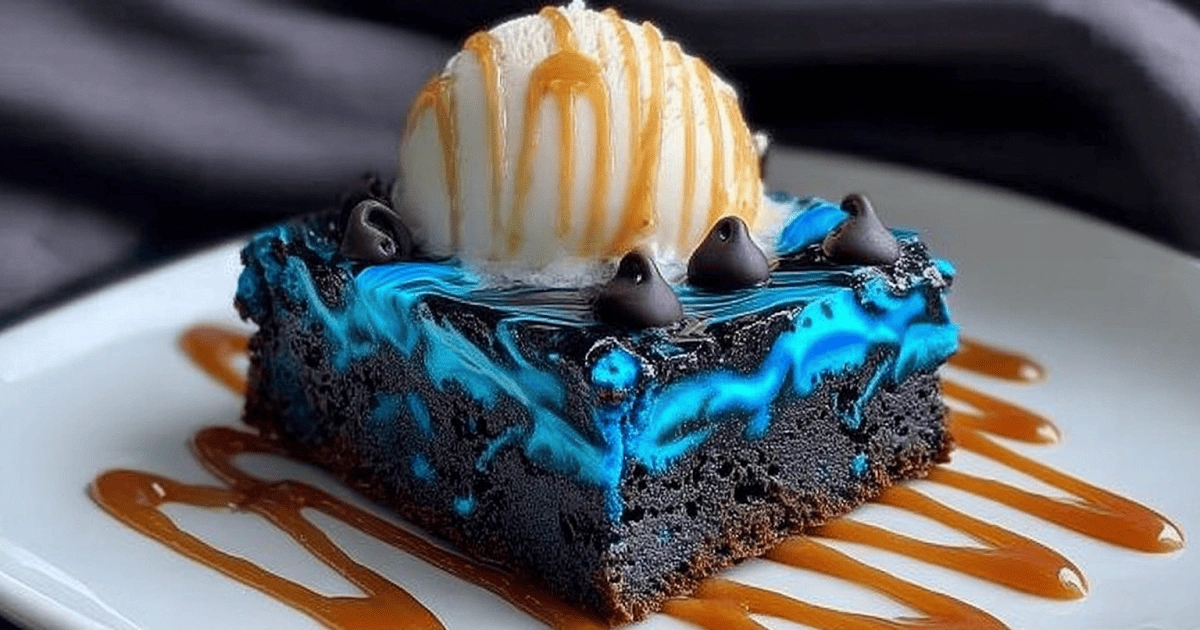
Place each brownie on a white or marble plate for maximum contrast. Garnish with a small swirl of whipped cream or a dusting of powdered sugar for a sophisticated touch. For extra flair, drizzle melted white chocolate over the top right before serving.
Pairing Suggestions: Coffee, Ice Cream, or Wine?
These brownies are rich and versatile, making them a great match for other flavors. Serve Blue Velvet Brownies with:
-
A scoop of vanilla bean or coconut ice cream
-
Hot or iced coffee with vanilla syrup
-
A glass of ruby port or semi-sweet red wine
Whether you’re hosting a brunch or an evening gathering, they fit in seamlessly — just like our other reader-favorite, Peanut Butter and Jelly Stuffed French Toast, they elevate casual meals into special moments.
How to Serve at Potlucks, Holidays, and More
Cut into bite-size cubes for potlucks or wrap individually for bake sales. You can also create Blue Velvet Brownie jars layered with cream cheese or whipped topping for a trendy, portable dessert option. Perfect for bridal showers, graduation parties, and themed birthdays.
Common Mistakes and How to Fix Them
Avoiding Overbaking or Undermixing the Batter
One of the biggest mistakes in baking Blue Velvet Brownies is overbaking. The key is to remove them when the center is still slightly soft — they’ll continue cooking as they cool. Set a timer and check at the 28-minute mark. Use an oven thermometer to avoid guesswork.
Undermixing is another trap. Mix your wet and dry ingredients until just combined. Overmixing develops gluten, making brownies dense and rubbery.
When the Color Turns Green or Grey – Why It Happens
Ever pulled your Blue Velvet Brownies from the oven only to find them greenish? That’s likely due to a high pH interaction between the cocoa powder and baking soda. Stick to natural cocoa powder and gel food coloring for best results. Avoid using Dutch-processed cocoa, which can alter the chemistry.
Fixing Crumbly, Dry, or Dense Brownies
If your brownies crumble or dry out, you may have used too much flour or baked too long. For dense brownies, the culprit is often overmixing. Add 1–2 tablespoons of milk to your next batch for added moisture. Always spoon and level your flour never scoop directly.
FAQs About Blue Velvet Brownies
Can I use regular food coloring instead of gel food coloring for the Blue Velvet Brownies?
Technically, yes — but it’s not ideal. Regular liquid food coloring is far less concentrated than gel, which means you’ll need more to achieve the same rich blue color. Unfortunately, using too much liquid dye can water down your batter, affect the texture, and dull the color. For bold, Instagram-ready Blue Velvet Brownies, gel coloring is your best option.
Can I use store-bought Oreo crumbs instead of crushing whole Oreos for the truffle layer?
Absolutely. Store-bought Oreo crumbs offer a quick, mess-free alternative and create a smoother truffle layer. However, crushed whole Oreos (with the filling) provide extra richness and a slightly chunkier texture that many people prefer. Both work choose based on your time and texture preference.
Can I make Blue Velvet Brownies ahead of time for a special occasion?
Yes! Blue Velvet Brownies are perfect for prepping in advance. You can bake and chill them up to 48 hours before serving. If adding cream cheese or truffle toppings, apply those a few hours before your event to maintain freshness. They also freeze well just wrap tightly in plastic wrap and store in an airtight container for up to 2 months.
Can I customize the toppings for Blue Velvet Brownies?
Definitely. The beauty of Blue Velvet Brownies lies in their versatility. From white chocolate chips and chopped pecans to colored sprinkles and drizzles, your topping options are endless. For themed occasions, consider color-coordinated swirls or edible glitter. You can even layer with frosting or ganache just don’t overpower the signature blue velvet flavor.
Conclusion
Whether you’re baking for a birthday, baby shower, or just craving a show-stopping treat, Blue Velvet Brownies are the ultimate way to bring color and flavor to your dessert table. Their rich, cocoa-laced base, creamy Oreo truffle layer, and customizable toppings make them both indulgent and adaptable. Plus, they store and freeze beautifully, making them ideal for planning ahead.
For even more rich, southern-inspired dessert ideas, don’t miss our Southern Chocolate Cobbler a one-pan wonder that brings gooey comfort straight to your plate.
Now that you’re armed with tips, variations, and expert techniques, it’s time to bake a batch of Blue Velvet Brownies that look as stunning as they taste.
